


Direct-to-Film (DTF) transfers are advanced printing techniques that apply intricate designs directly onto various surfaces, renowned for their durability and vibrant colors. Success depends on precise heating control, considering film types, surface conditions, and environmental factors. Optimal results require preheating substrates, maintaining clean work areas, and adhering to manufacturer guidelines for heat application times and temperatures (82°C-96°C). Proper post-heating further ensures strong bonding between the DTF transfer and substrate, preventing damage and showcasing high-quality designs.
“Discover the art of applying direct-to-film (DTF) transfers with precision using optimal heat settings. This comprehensive guide navigates you through the process, from understanding DTF technology’s essence to mastering heat application techniques. Learn how factors like material types and ambient conditions impact temperature and timing decisions.
Uncover preheating strategies, common pitfalls to steer clear of, and post-heating routines for guaranteed successful DTF transfer implementation.”
- Understanding Direct-to-Film (DTF) Transfers: A Brief Overview
- Factors Influencing Heat Settings for DTF Transfers
- Preheating and Preparation Techniques
- Optimizing Heat Application: Temperature and Time Considerations
- Common Mistakes to Avoid During the Heating Process
- Post-Heating Steps for Successful DTF Transfer Application
Understanding Direct-to-Film (DTF) Transfers: A Brief Overview
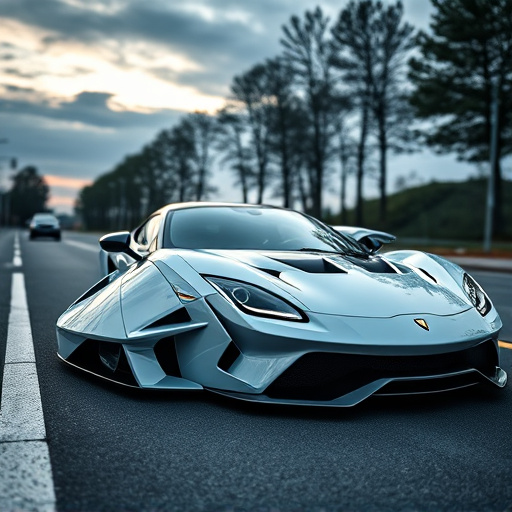
Direct-to-Film (DTF) transfers are a cutting-edge method in the printing and graphics industry, offering an innovative way to apply intricate designs directly onto various surfaces, from vehicles to walls. This process involves transferring high-quality images or patterns from a digital file onto a specific film, which is then carefully applied to the desired substrate using heat and pressure. DTF Transfers are renowned for their exceptional durability and vibrant colors, making them a popular choice for long-lasting outdoor signage, custom vehicle graphics, and interior decorations.
The beauty of DTF lies in its versatility; it can be used on an array of materials, including vinyl, polyester, and even fabric. This technology has revolutionized the way we create and install graphic designs, eliminating the need for traditional methods like screen printing or hand painting. By utilizing specialized software and precise heating techniques, professionals can produce detailed, precise transfers, ensuring a seamless finish that enhances any space or object they are applied to.
Factors Influencing Heat Settings for DTF Transfers

When setting the heat for applying direct-to-film (DTF) transfers, several key factors come into play, ensuring optimal adhesion and long-lasting durability. The first consideration is the type of film used; different materials have varying melting points and thermal properties. For instance, vinyl films tend to require lower temperatures for activation, while more robust materials like polycarbonate may demand higher heat settings.
Additionally, the surface being transferred plays a crucial role. Rougher or porous surfaces often necessitate increased heat to ensure complete contact and bonding with the film. The thickness of the transfer film itself is another variable; thinner films may require gentler heating to prevent damage, whereas thicker layers might need more intense heat application. Environmental conditions, including humidity and air temperature, can also influence settings, as moisture can affect adhesion and heat distribution.
Preheating and Preparation Techniques

Before applying a direct-to-film (DTF) transfer, preheating and proper preparation are essential steps for achieving optimal results. Start by preheating your film or substrate to the recommended temperature, typically close to the DTF product’s specified range. This ensures that the material is ready for bonding with the desired design. Preheating can be done in a controlled environment using heat presses or specialized ovens designed for this purpose.
During preparation, ensure your work area is clean and free from debris. Lightly dusting or wiping down the surface helps create a smooth canvas for the DTF transfer. Additionally, consider any necessary priming or surface treatments to enhance adhesion. These techniques, combined with the right preheating, set the stage for a successful application, ensuring the DTF transfer adheres well and produces vibrant, long-lasting results.
Optimizing Heat Application: Temperature and Time Considerations
Optimizing heat application is key to achieving a crisp, long-lasting DTF transfer. The primary factors to consider are temperature and time. For most materials, a range between 180°F to 205°F (82°C to 96°C) is ideal for applying pressure and melting the adhesive beneath the film. However, this can vary depending on the specific DTF product and substrate, so always consult the manufacturer’s guidelines.
Time spent under heat also plays a crucial role. A typical application might last from 15 to 30 seconds, but again, this varies based on materials and desired results. Longer exposure increases the risk of over-fusing or damaging the film, while shorter durations may not adequately activate the adhesive. Finding the right balance ensures the DTF transfer adheres firmly and remains intact during subsequent handling and washing processes.
Common Mistakes to Avoid During the Heating Process

When applying direct-to-film (DTF) transfers, heating is a crucial step that requires precision to achieve optimal results. Common mistakes often arise from misjudging the heat level and duration, leading to poor adhesion or even damage to the film. One of the most frequent errors is applying excessive heat, which can cause the transfer to bubble, wrinkle, or become distorted. This is particularly true for delicate materials or films with specific adhesive properties.
Another blunder is not heating the surface sufficiently before applying the DTF transfer. Adequate preheating ensures that the substrate and adhesive reach a compatible temperature, fostering better bonding. Insufficient heat can result in a weak connection between the film and the surface, while over-heating may cause unwanted shifts or damage to the design itself. Always refer to the manufacturer’s guidelines for recommended heating temperatures and times to avoid these pitfalls.
Post-Heating Steps for Successful DTF Transfer Application
After applying the direct-to-film (DTF) transfer, the next crucial step is post-heating. This process ensures that the transfer adhesive properly bonds with the substrate, creating a durable and high-quality final product. The ideal post-heating temperature and duration vary depending on the specific DTF product and material used; thus, it’s essential to consult the manufacturer’s guidelines for precise instructions. Typically, a gradual heating process is recommended, starting at a lower temperature to soften the adhesive and allowing the transfer to conform to the substrate before increasing the heat to activate the full bonding strength.
For optimal results, maintain consistent pressure during post-heating, ensuring no bubbles or air pockets are trapped beneath the transfer. The time required may range from several minutes to an hour, depending on the size of the design and the materials involved. Rapid cooling is generally not recommended, as it can lead to improper bonding. Instead, allow the heated transfer to cool down naturally to prevent warping or damage to the substrate or the transferred image.