
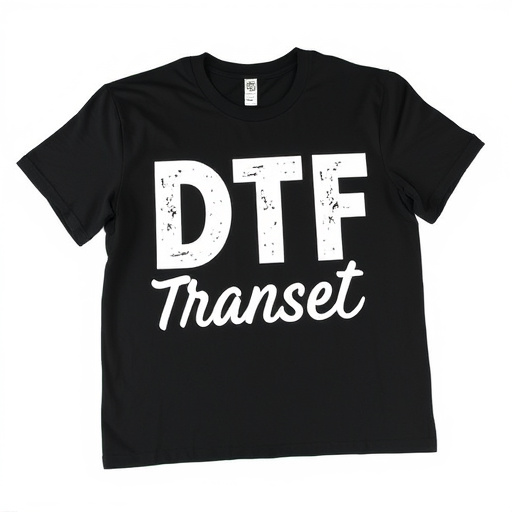


Direct-to-Film (DTF) transfers have revolutionized vehicle graphics with their precision, durability, and versatility. Achieving high-quality DTF prints requires careful consideration of heat settings (150°C – 200°C/302°F – 392°F) and press durations (15-30 seconds). Testing on scrap material is key to fine-tuning these settings for specific materials and designs. Applying heat involves understanding the impact of film type, substrate, design complexity, and ink. Using advanced printers with precise temperature controls ensures crisp, long-lasting DTF prints tailored to each project's unique needs. Avoiding common mistakes like over- or insufficient heating prevents distorted or unbonded films.
Looking to master the art of applying direct-to-film (DTF) transfers? This comprehensive guide unravels the intricacies of DTF printing, equipping you with the knowledge to achieve flawless results. From understanding the unique properties of DTF transfers to mastering the science behind ideal heat settings, we demystify each step. Learn how factors like material types and application techniques impact heat application, and discover a simple, detailed process for achieving high-quality, long-lasting DTF prints.
- Understanding Direct-to-Film (DTF) Transfers: A Brief Overview
- Choosing the Right Heat Settings for Optimal DTF Printing
- Factors Influencing Heat Application for DTF Transfers
- Step-by-Step Guide: Applying Heat to DTF Prints
- Common Mistakes to Avoid During DTF Transfer Heating
- Tips for Achieving High-Quality, Long-Lasting DTF Results
Understanding Direct-to-Film (DTF) Transfers: A Brief Overview

Direct-to-Film (DTF) Transfers are a cutting-edge printing method that has revolutionized the way we apply graphics to various surfaces, particularly in the automotive industry. This innovative process involves transferring durable, high-quality prints directly onto film, which is then applied to cars, trucks, and other vehicles. DTF offers unparalleled precision, vibrant colors, and exceptional durability, making it a preferred choice for both professional sign makers and DIY enthusiasts.
The key advantage of DTF Printing lies in its versatility. It allows for the creation of intricate designs with fine details, ensuring every element is reproduced accurately on the final product. This technology has made it easier than ever to transform vehicles into mobile advertisements or personal expressions of style, as DTF Transfers can be easily customized and installed, providing a long-lasting and visually appealing finish.
Choosing the Right Heat Settings for Optimal DTF Printing

When applying direct-to-film (DTF) transfers, selecting the appropriate heat settings is paramount to achieving optimal print results. The ideal temperature and pressing duration vary based on several factors, including the type of film, ink, and substrate used. Generally, higher temperatures provide better adhesion but can increase the risk of ink migration or damage to sensitive materials. For DTF transfers, a range between 150°C to 200°C (302°F to 392°F) is often recommended. Start with a lower temperature and gradually increase it if necessary, ensuring careful monitoring during the pressing process.
Pressing duration should also be adjusted accordingly. Longer durations can ensure better bonding but may lead to unwanted artifacts or curing of the ink, affecting future print quality. As a rule of thumb, hold the press for 15-30 seconds at the optimal temperature. Experimentation is key; test prints on scrap material to fine-tune settings specific to your setup and materials. This process will result in crisp, vibrant DTF prints that showcase intricate details and colors accurately, enhancing the overall quality of your projects.
Factors Influencing Heat Application for DTF Transfers

When applying heat to direct-to-film (DTF) transfers, several factors come into play, ensuring optimal adhesion and print quality. The first critical aspect is the type of film used; different DTF films have varying heat requirements. Some are designed for lower-temperature application, while others demand higher heats to ensure effective transfer. The substrate material also plays a significant role; applying heat to surfaces like fabric or wood requires specific considerations to prevent damage or delamination.
Furthermore, the design complexity and ink used can influence heat application. Intricate designs with fine lines might necessitate lower temperatures to avoid bleeding or smudging, while solid blocks of color may tolerate higher heats. The printing machine’s capabilities are also essential; advanced DTF printers often come with precise temperature controls, allowing for more accurate heat application. Understanding these factors enables users to achieve crisp, long-lasting DTF prints.
Step-by-Step Guide: Applying Heat to DTF Prints

Applying heat is a crucial step in the process of creating high-quality DTF (Direct-to-Film) transfers. Here’s a step-by-step guide to ensure optimal results:
1. Preparation: Start by ensuring your workspace is clean and well-ventilated. Gather all necessary tools, including a heat press machine, DTF film, and the substrate onto which you’ll be applying the transfer (like a t-shirt or mug). Adjust your heat press to the recommended temperature for your specific DTF material. The temperature can vary based on the type of ink and film used, so always check the manufacturer’s instructions.
2. Positioning: Carefully align the DTF film with your substrate. Ensure the adhesive side of the film is facing down, ready to make contact with the material. Once positioned, place the heated platens of your heat press on top of the film, creating a sealed space between the heat and the substrate. Apply pressure evenly across the entire surface, following the manufacturer’s guidelines for pressure and time. After the recommended time has passed, carefully remove the heat press, allowing the transfer to cool down slightly before peeling away the DTF film to reveal your printed design on the substrate.
Common Mistakes to Avoid During DTF Transfer Heating

When applying direct-to-film (DTF) transfers, heating is a critical step that requires precision to achieve optimal results. Common mistakes can lead to defective DTF prints, so it’s essential to be aware of potential issues. One frequent error is overdoing the heat, which can cause the film to melt or distort, resulting in blurry or warped images on the final product. It’s crucial to set the temperature just right, following the manufacturer’s guidelines for specific materials and designs.
Another mistake to avoid is insufficient heating. Inadequate heat transfer can leave the DTF film unbonded to the substrate, leading to peeling or a lackluster finish. Ensure even heat distribution across the entire surface area to prevent these issues. Proper timing is also key; allowing the heat to set for too short or too long can affect the adhesion and longevity of the transfer, so always adhere to recommended time frames.
Tips for Achieving High-Quality, Long-Lasting DTF Results

To achieve high-quality, long-lasting DTF (Direct-to-Film) results, pay close attention to your heat settings. The ideal temperature range for applying DTF transfers varies based on the material and ink used, but generally falls between 130°C – 150°C (266°F – 302°F). Start with a lower temperature and gradually increase it if needed, ensuring you don’t overheat the film or substrate. Precise control is key; use a heat press with adjustable settings for optimal results.
Allow sufficient pressure during the pressing process—around 40-60 psi (pounds per square inch)—to ensure good contact between the DTF transfer and the surface. Time is equally important; keep the press at the set temperature for approximately 15-30 seconds, depending on the materials and desired imprint quality. After removing the heat press, let the transferred image cool down before handling it to prevent warping or smudging of the final print, ensuring your DTF prints turn out crisp and durable.